How to Set up Gmail to Send Invoices, Estimates etc.
Go to your Business profile: Business Profiles | Invoice Crowd
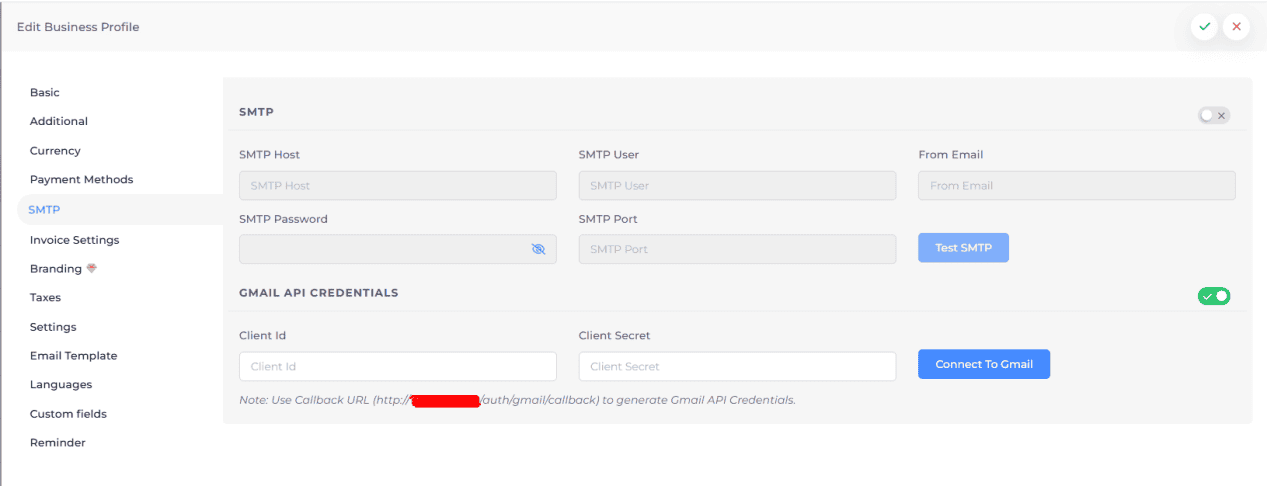
Edit your Business profile and go to SMTP tab
Enable the “Gmail Api Credentials"
Add the Client ID and Client Secret
Click "Connect to Gmail"
How to generate Gmail API Credentials Guide
This guide outlines the steps to generate the Client ID and Client Secret required to send emails via Gmail in your business profile SMTP settings.
Prerequisites
A Google Account.
Access to the Google Cloud Console.
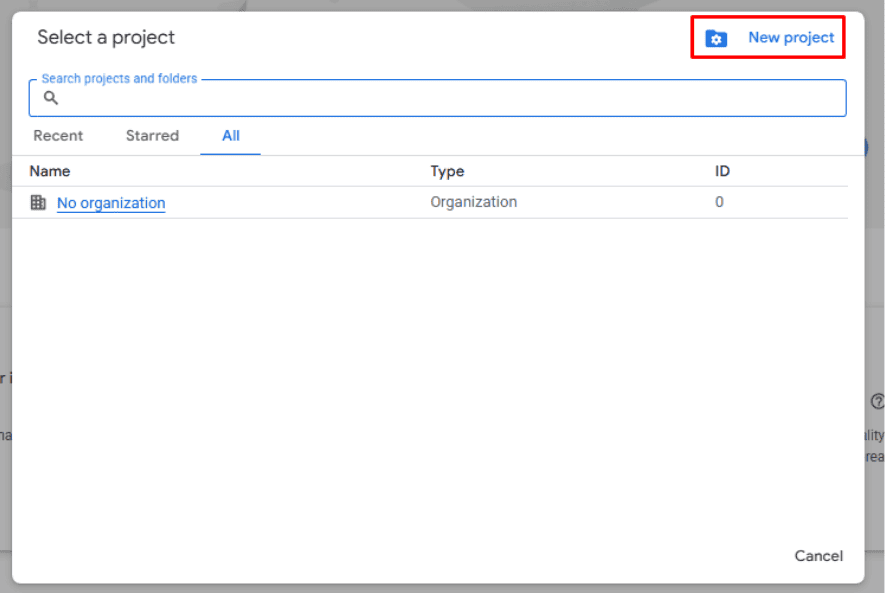
Step 1: Create a Project
Go to the Google Cloud Console.
Click on the project dropdown at the top of the page.
Click New Project.
Enter a project name (e.g., "InvoiceCrowd Emailer") and click Create.
Select the newly created project from the dropdown.

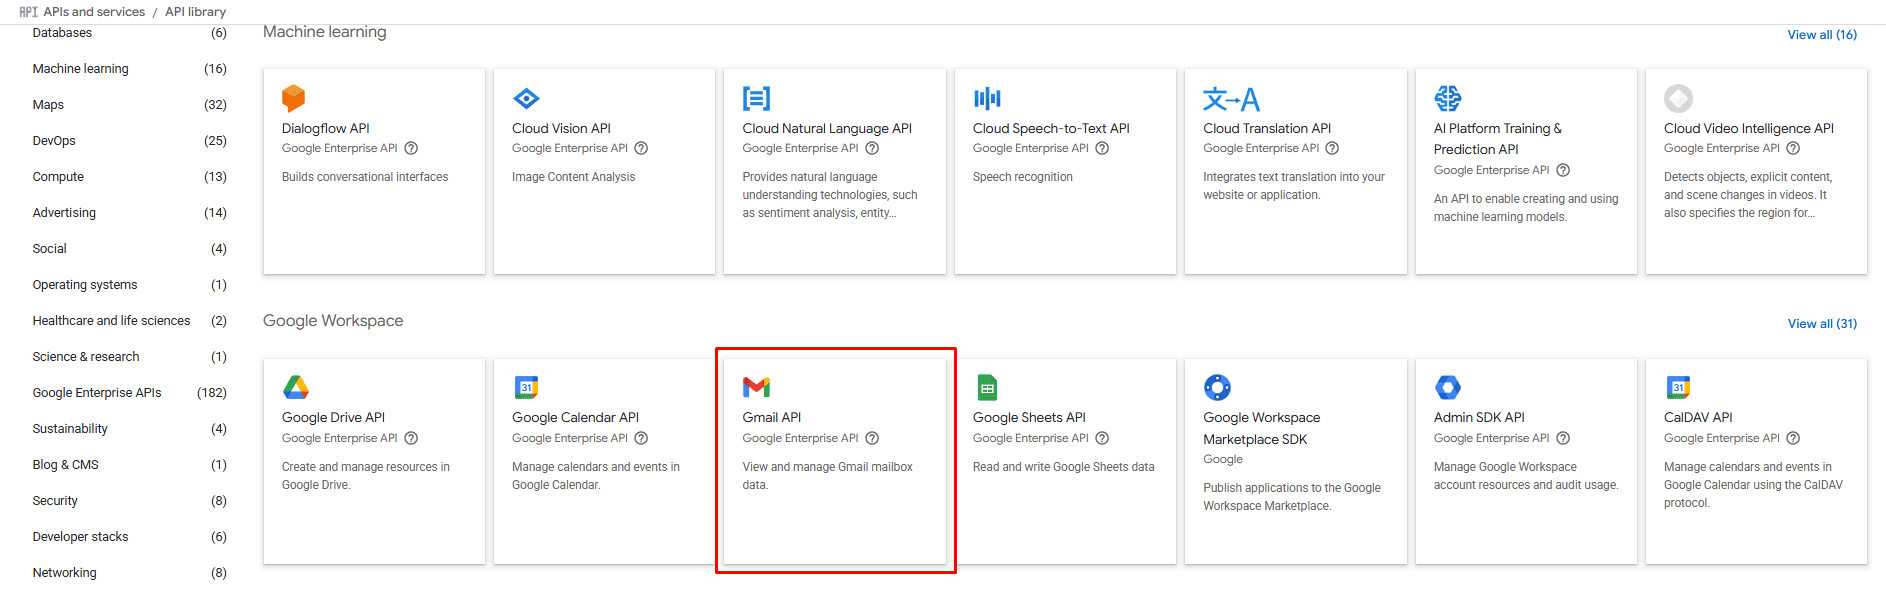
Step 2: Enable the Gmail API
In the left sidebar, navigate to APIs & Services > Enabled APIs & services.
Click + ENABLE APIS AND SERVICES at the top.
Search for Gmail API.
Click on the Gmail API result.
Click Enable.

Step 3: Configure the OAuth Consent Screen
In the left sidebar, navigate to APIs & Services > OAuth consent screen.
Select External (or Internal if available/appropriate for your organization) and click Create.
Fill in the App Information: - App name: Your Application Name (e.g., InvoiceCrowd) - User support email: Your email address.
Scroll down to Developer contact information and enter your email address.
Click Save and Continue.
(Optional) You can skip the Scopes and Test Users sections for now by clicking Save and Continue, or configuring them if you know your specific needs.
Review your summary and click Back to Dashboard.

Step 4: Disabling "Test" Status (Important)
If you set the User Type to External, your app will be in "Testing" mode by default.
In the OAuth consent screen dashboard, click PUBLISH APP to make it available to any user with a Google account (or leave it in testing and add specific test users). - Note: For personal use or limited testing, you can add your own email to the "Test users" list instead of publishing.
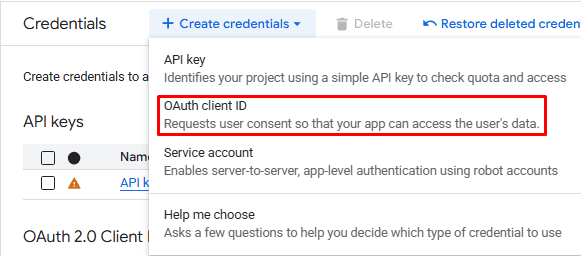
Step 5: Create Credentials
In the left sidebar, navigate to APIs & Services > Credentials.
Click + CREATE CREDENTIALS at the top and select OAuth client ID.
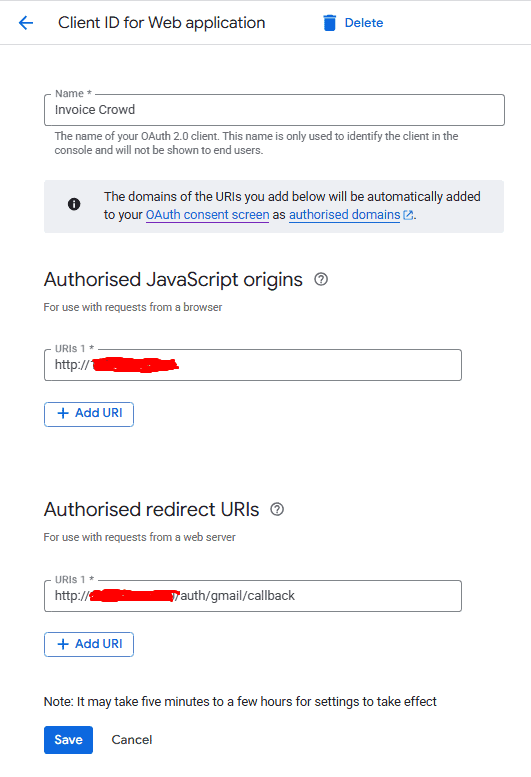
For Application type, select Web application.
In the Name field, enter a name (e.g., "Web Client 1").
Under Authorized redirect URIs: - Click + ADD URI. - Enter the callback URL found in your application settings. - Look for the note in your SMTP settings page: "Note: Use Callback URL (https://apps.invoicecrowd.com/auth/gmail/callback) to generate Gmail API Credentials." -
Click Create.
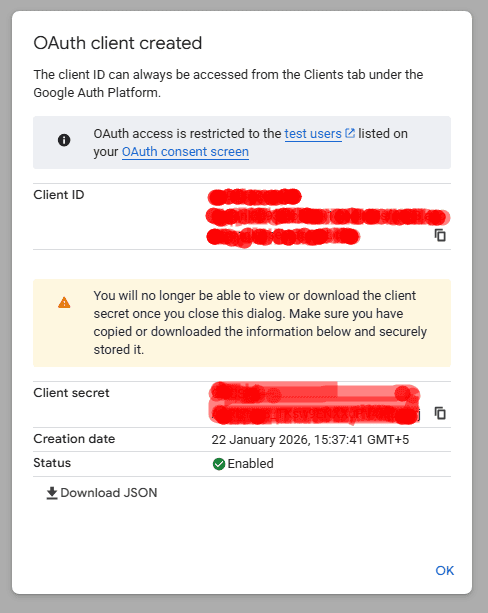
Step 6: Get Your Credentials
A popup will appear with your Your Client ID and Your Client Secret.
Copy these values.
Go back to your application's Business Profile > SMTP Settings.
Enable API Credentials.
Paste the Client ID and Client Secret into the respective fields.
Save your settings and click Test API to verify the connection.