Step 1: Log in to Invoice Crowd
- Use your credentials to log in to your Invoice Crowd account.
Step 2: Navigate to Invoices
- From the Dashboard, click on the "Invoices" option.
Step 3: Create or Select an Invoice
- Create or select the invoice for which you want to set up a partial payment option.
Step 4: Access Payment Options
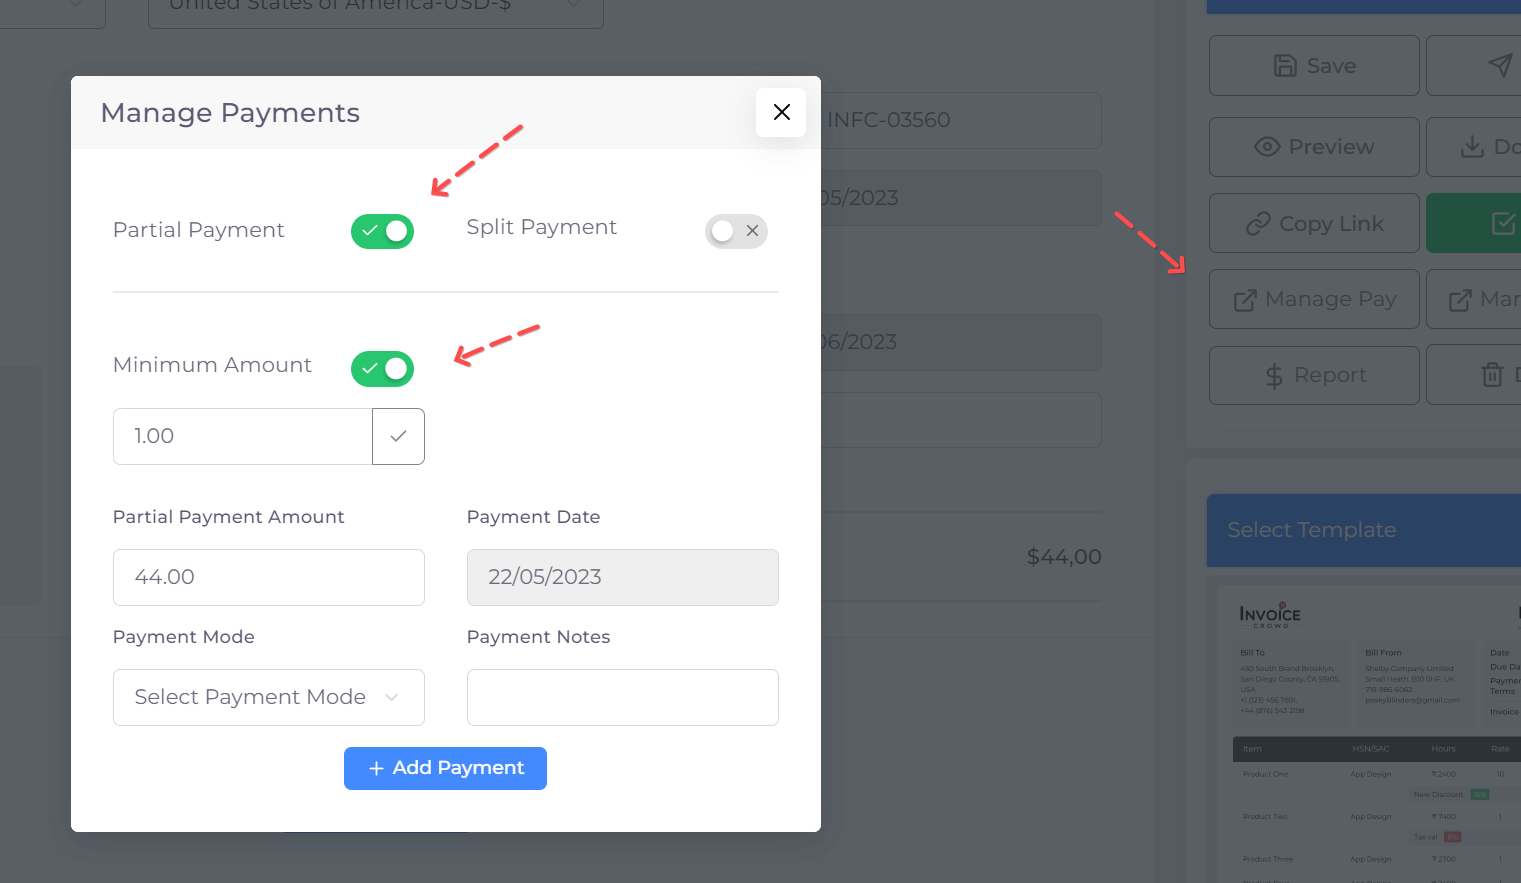
- On the invoice page, click on "Manage Pay" to reveal additional payment options.
Step 5: Enable Partial Payments
- Locate the "Partial Payment" toggle within the "Manage Pay" options. Click this toggle to turn it ON. Once enabled, your customers will have the ability to pay a portion of the total invoice amount at their discretion.
Step 6: Set a Minimum Payment Amount (Optional)
- If you wish to set a minimum limit for the partial payment, you can do so by enabling the "Minimum Amount" option.
- After enabling, enter the minimum amount that the customer should pay for each partial payment.
- Remember, the customers will be prompted to enter an amount higher than the minimum amount you set here.
Step 7: Save Payment Settings
- After adjusting all settings to your liking, click on the close button and then "Save" the invoice to apply these changes to the invoice.
Step 8: Review Invoice
- With the partial payment option enabled and minimum amount set (if applicable), the invoice should now show these updated settings. Your customer will have the option to pay a partial amount greater than the minimum amount you set (if any) when they click on the pay button.