Businesses often incur additional expenses, such as office supplies or postage, that need to be reflected in estimates. Manually adding these details can be cumbersome and prone to errors, making it difficult to track and categorize expenses effectively.
The Expense Items feature allows you to add categorized expense items directly into your estimates. This ensures all incurred costs are accounted for while providing clarity to your customers.

Steps to Add Expense Items to Estimates
-
Enable Expense Items
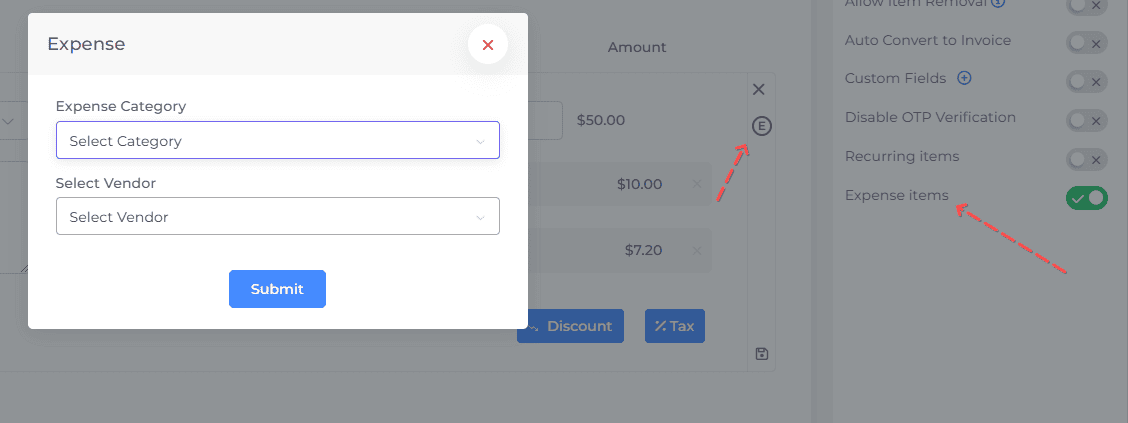
- In the estimate editor, open the Options panel on the right sidebar.
- Toggle the Expense Items option to enable it.
-
Identify Expense Items
- Once enabled, an E button will appear next to each item in the estimate.
-
Add an Expense Item
- Click on the E button next to the relevant item to open the Expense Category popup.
- From the dropdown, select the relevant expense category (e.g., Office Supplies, Postage, Stationery).
- If necessary, select vendor.
-
Save the Expense Item
- Add the amount and save the expense item to the estimate.
- The expense item will now be listed in the estimate, clearly categorized and itemized.
-
Save and Send the Estimate
- Save the updated estimate and send it to your customer. The expense items will be added to your business expense report.
