Sometimes, standard fields in an estimate may not capture all necessary details, such as project-specific information or regulatory requirements. Without a way to add custom fields, important information might get overlooked.
The Custom Fields feature allows you to add tailored fields to estimates. You can choose where the fields appear (top or bottom of the estimate) and even create predefined fields that are automatically added to future estimates.

Steps to Add and Manage Custom Fields in Estimates
-
Enable Custom Fields
- In the estimate editor, open the Options panel on the right sidebar.
- Toggle the Custom Fields option to enable it.
- This will activate two field sections at the top and two near the bottom of the estimate.
-
Add Custom Fields to the Estimate
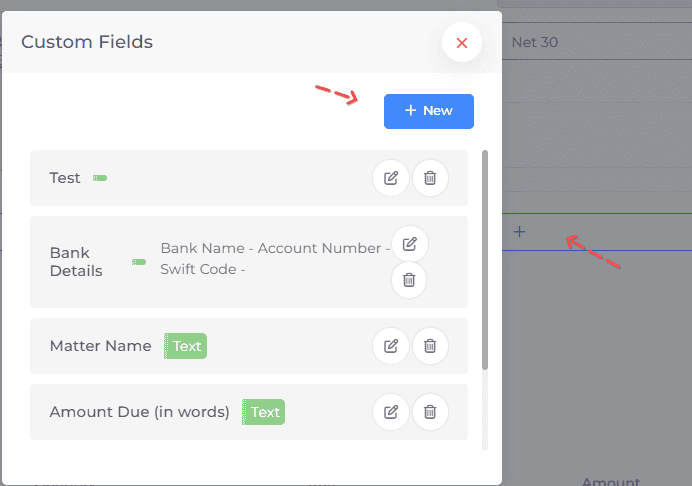
- Click on the plus icon (+) in any of the highlighted sections (top or bottom of the estimate).
- A popup will appear, displaying a list of available custom fields.
-
Select an Existing Custom Field
- Choose a custom field from the list, and it will be added to the estimate.

- Choose a custom field from the list, and it will be added to the estimate.
-
Create a New Custom Field
- In the popup, click the New button to create a custom field.
- Provide a name for the field and select the field type (e.g., text, date, number, or textarea).
- Save the new custom field, and it will be available for use in the estimate.
-
Predefine Custom Fields in Business Profile Settings
- To add custom fields that appear automatically in all future estimates:
- Go to Business Profiles in the menu.
- Open the Custom Fields tab in the settings.
- Click + Add Custom Fields, set the name, type, and predefined position (e.g., top left, bottom right), and save.
- To add custom fields that appear automatically in all future estimates:
-
Save and Send the Estimate
- Once you’ve added the desired custom fields to the estimate, save the changes and send the estimate to your customer.
